A Practical Guide to Managing the Website

Use these steps to manage property records, publish Insights and check enquiries. A phone works for simple status or copy changes; use a computer for galleries, tables and first-time setup, then check every public page at both sizes.

Open the WordPress dashboard

Before You Start

Use the separate HomeBroker website-editor login issued for WordPress. The client-portal login is for messages and revision requests; it cannot edit website content. Keep both logins private and preview important changes before publishing.

Make a Simple Update from a Phone

WordPress adapts to a narrow screen. Use phone editing for a small, urgent change such as switching Listing Status, correcting a sentence or saving an existing record. Use a computer when adding galleries, comparing many fields or building a new page.

  1. Open the appropriate dashboard shortcut above and sign in with the website-editor login.
  2. Open the existing Property or Insight. For Listing Status, scroll to Property Details. Use the Settings button at the top for taxonomy, excerpt or the featured-image panel.
  3. Change only the intended field, choose View, then open Preview in new tab.
  4. Check the public page without zooming, return to the editor, then choose Save. If the screen feels cramped, stop and finish on a computer.

Add or Update a Property Listing

  1. Open Properties and choose Add New Property, or open an existing title.
  2. Enter the public Title and a factual Description in the main editor. Use Excerpt only as a fallback summary. Never place confidential owner information in public fields.
  3. In the right-hand Settings panel, select one existing Property Type, District and Market Segment, then set the Featured image. Select existing terms; do not create spelling variants.
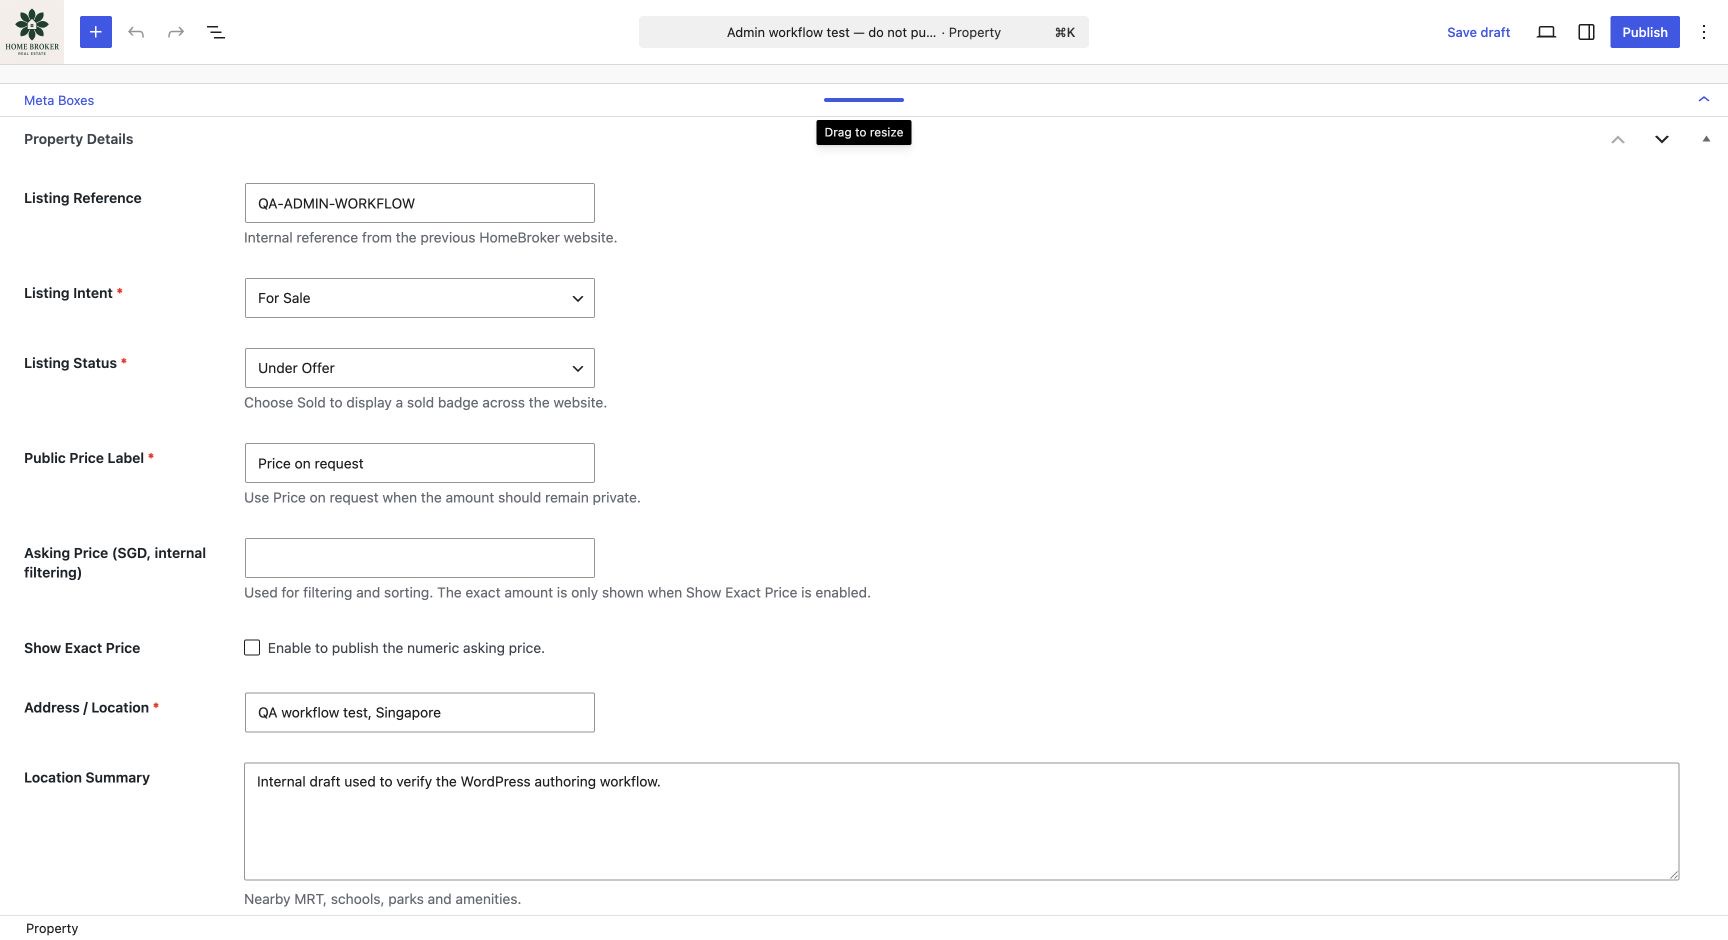
  4. In Property Details, complete every field marked *: Listing Intent, Listing Status, Public Price Label, Address / Location and Property Gallery. If a required fact is unknown, keep the WordPress page as a Draft.
  5. Enter Asking Price in whole SGD when known. It remains private unless Show Exact Price is enabled. Use “Price on request” when the amount must stay private.
  6. Enter Key Features one per line. In Specification Table, enter one Label | Value row per line. Add Location Summary, approved floor plans or a Virtual Tour URL only when available.
  7. Check the agent name, phone number and CEA registration. Leave Listing Reference and Migration Source URL unchanged.
  8. Choose View, open Preview in new tab, check the public page on phone and desktop, then choose Publish for a new page or Save for an existing page.

Swipe sideways to see all columns.

Property listing fields
Field What to enter Example format
Public title A concise title that identifies the home. Renovated 2.5 Storey Corner Terrace
Listing Status Use the current public state. Mark a completed listing Sold or Rented rather than deleting it. Available, Under Offer, Sold, Rented, Upcoming
Listing intent Choose For Sale or For Rent; it controls the public transaction label. For Sale or For Rent
Market segment The portfolio group visitors use to filter the listing. Brand New Landed, Resale Landed
District and type The Singapore district code and the property type. District 15 · Corner Terrace
Price Use “Price on request” unless an exact asking price is approved. Public price filters and price sorting include only listings with Show Exact Price enabled. Price on request
Key facts Bedrooms, bathrooms, Land Area, Floor Area, tenure and Completion / TOP when known. Use numbers and the units shown beside each field.
Overview A factual description of the property. Use headings and short paragraphs. Overview, Key Highlights, Location
Layout table Use the Specification Table field. Enter one Label | Value row per line. Level 1 | Living, dining, kitchen
Media Only approved gallery images, floor plans and a Virtual Tour URL. Use Manage Gallery or paste the approved tour URL.
Agent details The public agent name, contact number and CEA registration for this record. Cedrik Yu · +65 9431 4922 · R065098J

To Mark a Property as Sold

Open the listing, change Listing Status to Sold, choose Save and check the public card. Keeping the page preserves its address and allows the site to show the Sold label. WordPress Draft/Published controls whether the whole page is public; Listing Status describes the property itself.

How the Public Filters Work

The Listings archive reads Property Type, District, Market Segment, Tenure and Listing Status from each Property record. Keep those values structured and consistent; do not type alternatives into the description. Keyword search reads the title and public description. Price filters and price sorting use only publicly displayed numeric prices.

Create a Complete New Launch Project Page

  1. Choose Properties in WordPress and open an existing project or choose Add New Property. New launches use the same Property content type as other listings.
  2. Add the official project name, a featured image and the project gallery.
  3. Set Listing Intent to For Sale, choose the current Listing Status and tick New Launch under Market Segments. This adds the record to the Listings page’s New Launch collection.
  4. Complete the summary fields from an approved project source: Address / Location, District, Property Type, Total Units, Unit Mix, Land Area or Floor Area when applicable, Tenure, Completion / TOP and Developer. Put additional facts such as site area or unit-size ranges in the Specification Table using one Label | Value row per line.
  5. Add the project description using descriptive headings. Keep promotional claims attributable and current.
  6. Upload approved floor plans with useful file names and alt text. Add a Virtual Tour URL only when the destination has been checked.
  7. Add verified school, transport and amenity information to Location Summary. Do not invent travel times or distances.
  8. Preview the gallery, summary facts, floor plans or virtual tour and the enquiry card before publishing.

How New Launch Collections Update

Any published Property assigned New Launch joins the complete New Launch collection automatically. The six-card New Launches showcase puts featured projects first, then the most recently updated. To put a project in the homepage New Launch rail, also enable Feature on Homepage. The homepage hero slider remains curated separately.

Summary

Keep Structured Facts Separate

Use the dedicated fields so the same information can appear consistently in cards, tables and search results.

Floor plans

Upload in a Logical Order

Arrange plans from the smallest unit type to the largest, or follow the approved project-document order.

Accuracy

Review Changing Information

Prices, availability and project details can change. Check time-sensitive information before updating the public page.

Publish a Market Insight

  1. Choose Posts, then Add Post.
  2. Enter a specific Title. It becomes the page’s only H1; use Heading 2 for sections in the body.
  3. In the right Settings panel, add a Featured image, open Edit excerpt and write a short accurate Excerpt.
  4. Select at least one existing Category, such as Singapore Property Guides, Landed Homes or New Launches. Tags are optional.
  5. Add descriptive alt text through Media Library and credit a source when the image licence requires it.
  6. Link to the relevant HomeBroker property or new-launch page when it genuinely helps the reader.
  7. Choose View, then open Preview in new tab. The Title and Excerpt automatically supply the search preview.
  8. Check all facts, dates, names and links before choosing Publish or Save.

Four Starter Insights Are Live

The current archive includes guides to comparing districts, freehold and leasehold tenure, landed-home viewings and new-launch appointments. Keep future articles factual, original and supported by current official sources.

Keep the Media Library Organised

Before Uploading

  • Confirm that HomeBroker has permission to publish the image or document.
  • Use a descriptive file name, such as project-name-pool-view.webp.
  • Remove duplicate or irrelevant files before uploading.
  • Avoid putting confidential information in images, floor plans or PDF metadata.

After Uploading

  • Open Media, choose Library, select each image and fill Alternative Text with a short description of what is visible.
  • Choose the strongest landscape image as the featured image.
  • Check gallery order and image cropping on phone and desktop previews.
  • Open floor-plan and virtual-tour links once to confirm the correct item was attached.

Know When to Draft, Publish or Update

Draft

Use Draft while information, media or approval is incomplete. Draft pages are not ready for visitors.

Preview

Preview every new page and any important edit. Check both narrow and wide screens.

Publish or Save

Publish a new approved page. Use Save for changes to a page that is already live.

Know What Updates Automatically

Publishing or saving a Property updates its public detail page and the dynamic Listings archive. Homepage rails require a published Property, a Featured image, the matching Brand New Landed, Resale Landed or New Launch segment, and Feature on Homepage. Unticking Feature on Homepage removes the card from the homepage after refresh.

The homepage hero slider, static page copy and site-wide navigation are curated design areas. Request those changes through the client portal; do not duplicate a Property record.

After a Listing Change

  • Open the public Property page.
  • Find it in Listings with the expected filters.
  • Check its card and gallery on a phone.
  • If it is a New Launch, check the New Launch archive filter.

Give Every Public Page a Clear Search Preview

Post or Property Title

The WordPress title becomes the public heading and search title. Describe the exact page naturally and put the important subject near the beginning.

Excerpt and Opening Copy

An Insight uses its Excerpt. A Property uses the start of its main Description, or Excerpt only when Description is empty. Keep the opening factual and specific.

Page Address

Before first publication, open Settings, then Summary and URL, and use a short readable slug. Do not change an established address; ask Reputifly to arrange a redirect.

Check Forms After Any Form or Email Change

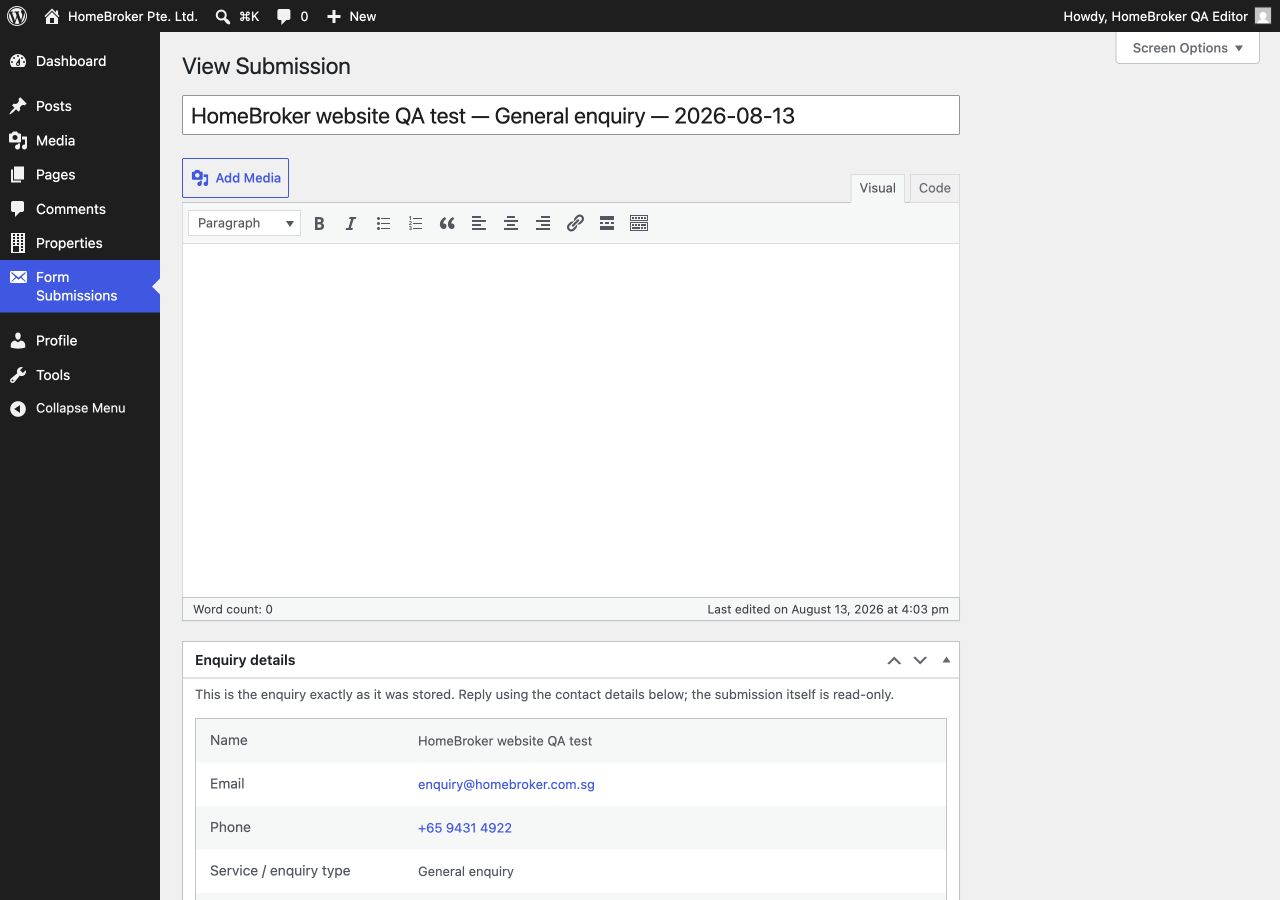
Open Form Submissions in WordPress to read saved enquiries. Each record shows the visitor’s name, email, phone, service and message. A green public confirmation proves the submission was stored; separately confirm the notification arrived at enquiry@homebroker.com.sg.

Form Submissions and their notification emails contain personal data. Access them only when authorised and never publish a visitor’s details. Follow HomeBroker’s retention practice for both copies: move the WordPress record to Trash, empty Trash only when authorised, and remove the matching notification email when it is no longer needed.

Send One Clear Test

On Contact, enter the required Name, Contact number and Email, choose General enquiry, then enter Website form test: no follow-up needed in Message. Send it once and check both WordPress and the inbox.
Verified WordPress Screens

WordPress Property editor showing HomeBroker listing status, price privacy and location fields
Property editor Verified in WordPress with a private draft: values were saved, the editor was reopened and every shown field persisted. The test draft was then removed.
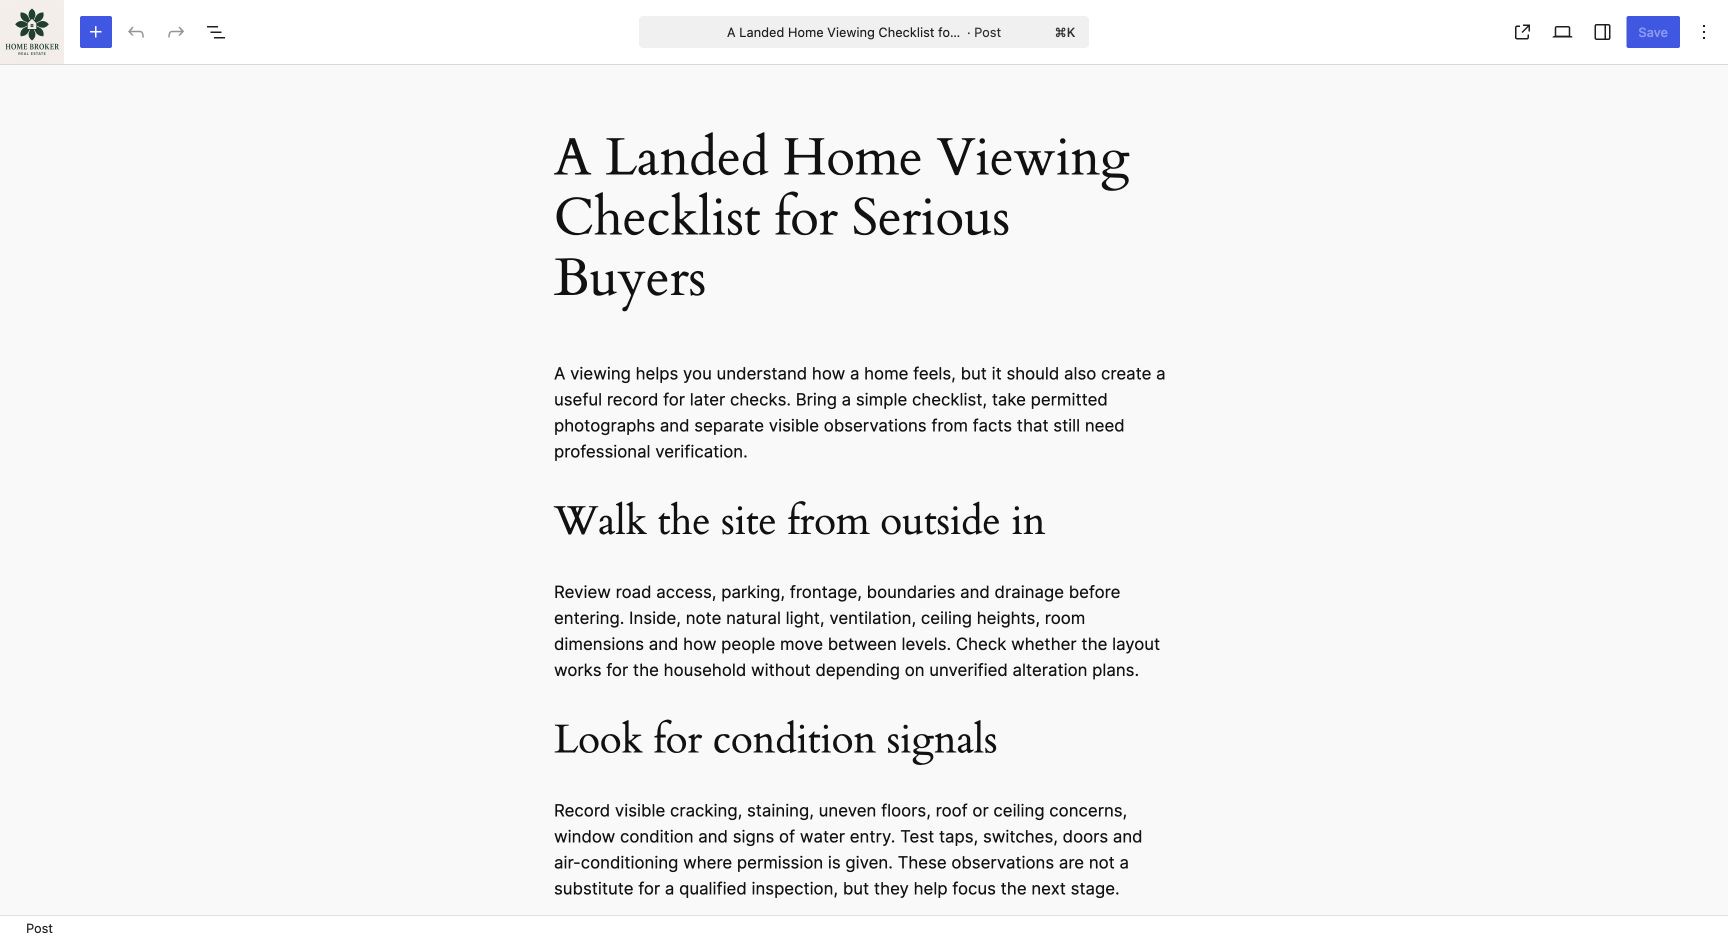
WordPress article editor showing a HomeBroker Singapore property guide
Article editor The Posts editor uses standard WordPress blocks. This published guide was opened and checked in the live dashboard.
WordPress Form Submissions screen showing a stored HomeBroker enquiry in a read-only details table
Enquiry details Verified as a website Editor: the saved name, email, phone, enquiry type and message are readable, while the submission remains read-only.

Before You Publish

  • Every required * field is complete and the WordPress page status is correct.
  • Unknown information has been left empty, not guessed.
  • Images and documents are approved for publication.
  • The featured image, gallery order and alt text are complete.
  • Existing market segment, district, property type, tenure and Listing Status values are correct.
  • Price privacy, phone numbers, gallery, floor plans and virtual tour work.
  • The title, excerpt or opening description and page address are clear.
  • The public page has been previewed on phone and desktop; a form test also reached the inbox when forms changed.